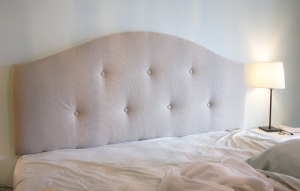
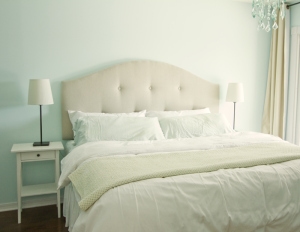
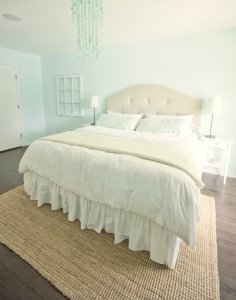
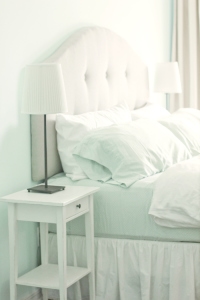
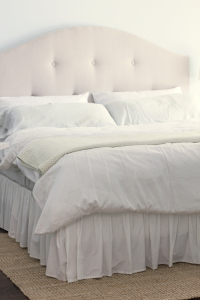
I’m here today to talk about a long overdue project I completed over the weekend: a headboard for our bed!
I took my time figuring out exactly what I wanted for this one (over a year, to be exact), and I think it’s a perfect fit for our room.
I found a handful of tutorials such as this, this, this, and this, began to gather my supplies.
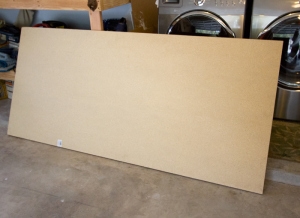
First thing to get was a large piece of MDF from Lowe’s (around $20, they cut it to size for me). We have a King size bed, so the measurements were around 78×35 for ours (I actually could have made it a few inches narrower though)
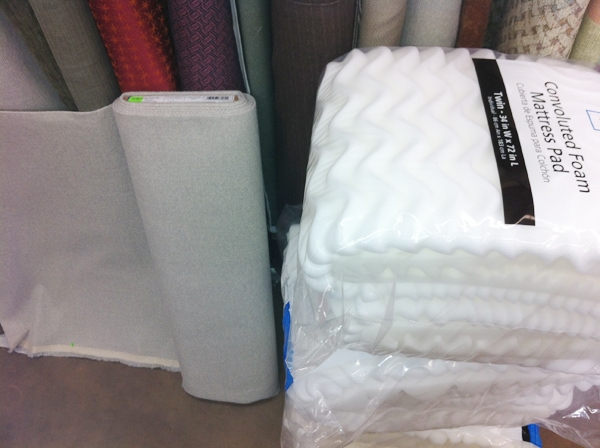
Next, I stopped by Walmart to pick up a few foam mattress toppers (the tutorials said it was much cheaper than 2″ or 3″ foam, and worked just as well). I wanted it extra thick, so I grabbed three for $10 each, and then headed to the fabric section just for kicks.
And then, I saw it:
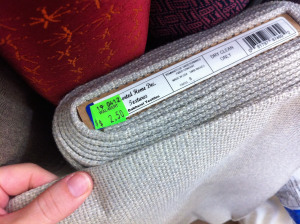
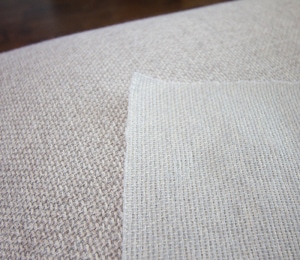
It was beyond perfect. Not only was it $2.50/yard, it was the perfect mix of grey and tan and woven texturedness I had dreamed of. I knew I wanted something natural and woven, and not the typical orangey-yellow burlap, but more of a soft gray. I seriously lucked out with this one.
And look, it matches our couch!
I bought 2.5 yards, along with a roll of batting and the three mattress covers. The total came to around $50, but luckily I still have some Christmas gift cards leftover… so my total: free.
Next I headed to Joann’s and picked up the rest of my supplies:
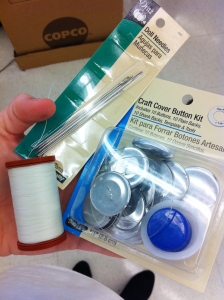
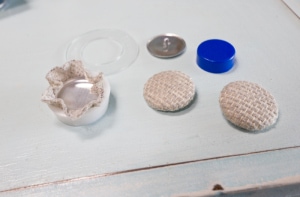
A button cover kit, decorators needle and upholstery thread. It was around $13 (after a coupon) for these.
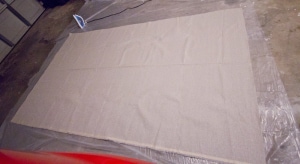
Once home, I laid out my fabric and ironed it out as best as I could (this is an important step that people tend to forget):
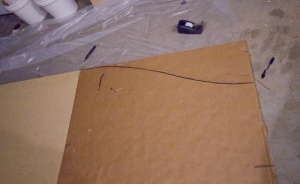
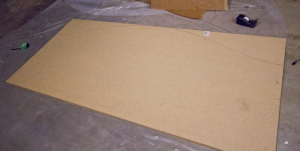
Once it was nice and smooth, I began drawing my template for the headboard shape. I used a large piece of cardboard, measured to the center of my headboard, and made the cardboard exactly half the width it. I then freehanded the curved shape I wanted:
Once I was happy with it, I used an Xacto knife and traced over the line, then traced the shape onto my board:
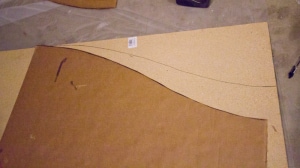
Then I lined it back up to the middle, flipped it over, and repeated:
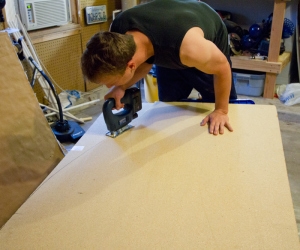
The next morning I woke up to find Brad in the garage, cutting the shape with our wireless jigsaw.
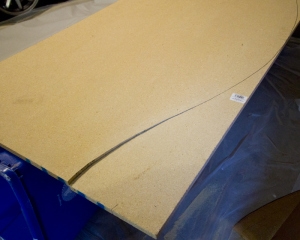
Unfortunately, wireless power tools are worthless, and it only got this far before the battery died:
So he borrowed our neighbor’s jigsaw to finish the job.
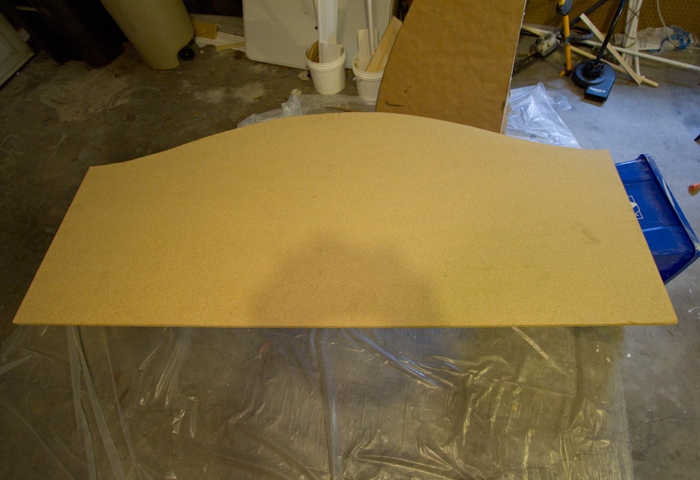
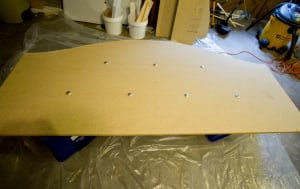
Ta-da!
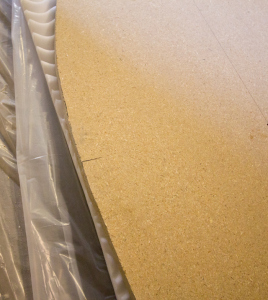
The edges weren’t perfect…. which isn’t a huge deal, but I took my hand sander out and smoothed out a couple small areas just to be safe.
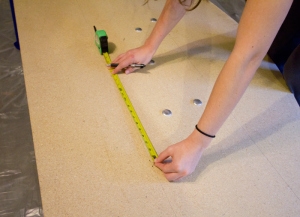
Next it was time to measure for the buttons. I decided to go with two rows: 3 on top, 4 on the bottom, in an alternating pattern.
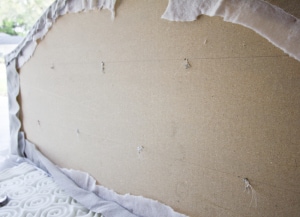
I already had my center line marked out, so it was an easy process from there. I placed them 15″ apart from each other, made my marks, and drilled holes all the way through.
Here’s a visual of the intended placement:
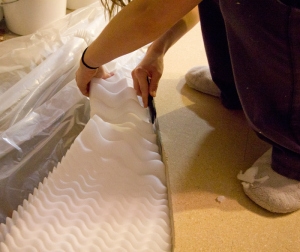
Next came the hardest part of this entire project… trying to ar
range the foam and cut them all perfectly to size.
But there was a problem.
I didn’t pay attention to the length when I bought them… oops.
So I had to revert to plan B: using just two layers, and cutting a small section to fill in the gap from the third.
Luckily, the width was the exact height of the headboard… I lucked out here.
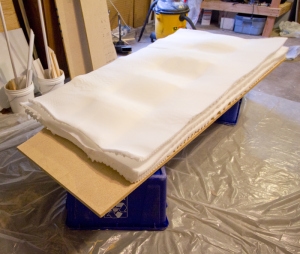
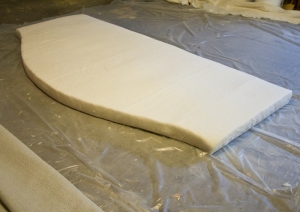
The problem with these things though is that they are flimsy, don’t lie completely flat, and the factory edges are not straight at all. Also, I don’t think I had the right tools to cut these… I was using a steak knife.
Here is a tip: apply pressure to the foam when you are cutting. The flatter and more condensed it is, the easier it will be to slice through.
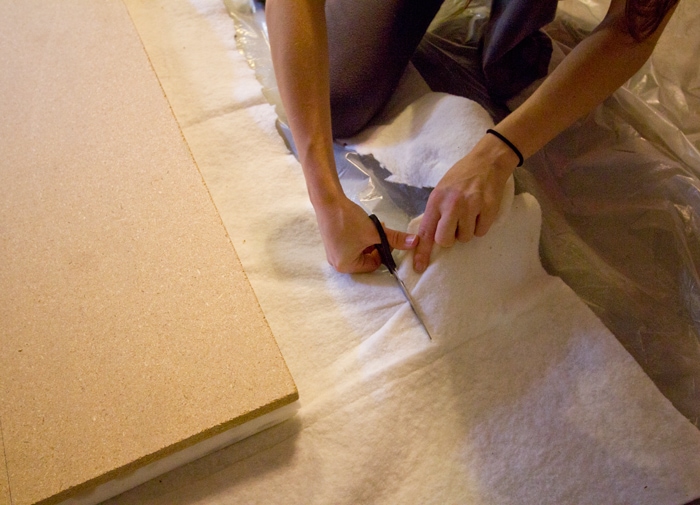
After a good 30 minutes though, I finally had everything as smooth as I could get it, and it was time to wrap it all up with batting.
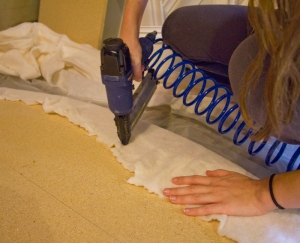
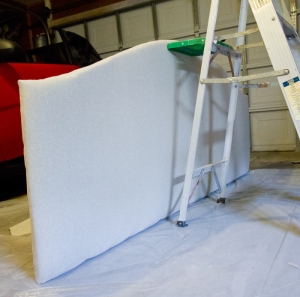
I lined everything back up as best as I could, set the batting down, trimmed the excess off around the edges, and stapled it up.
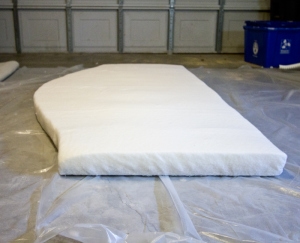
And it was starting to come together!
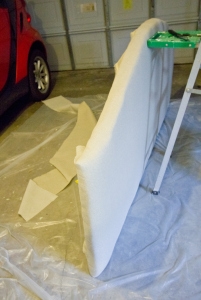
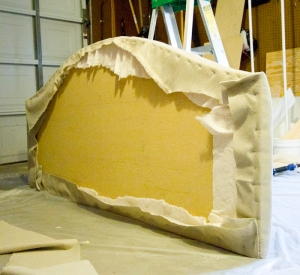
I repeated the batting process with the fabric, and then it was ready for tufting:
I went inside to figure out this button covering process, which was actually really simple…
After all 7 were completed, I headed back into the garage and got to work. I don’t have any in-progress shots of this because Brad wasn’t home, but here is the basic process: thread the needle, attach a washer to the end, push it through the hole and through the button, come back through the same hole, pull it tight, use a staple gun to hold the thread down, and wrap back around through the washer and around the staple to secure. After breaking the threads a couple times from pulling too hard, I double threaded my needle (so there was 4 strands). Make sure to push the needle through as straight as possible, so your buttons stay level.
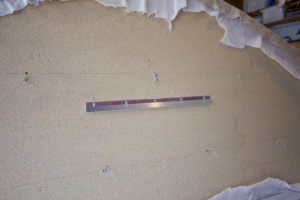
Finally, I attached a french cleat (my favorite method of hanging large objects… super easy!)
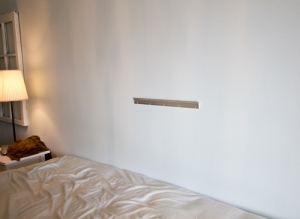
I measured and attached the other half to the wall:
And we had ourselves a headboard!
After this pic was taken, we ended up spraying some of the areas down with wrinkle releaser, which smoothed everything out perfectly.
And now, for the first time ever, this bedroom has a headboard!
Now for the cost breakdown (these are rough estimates, since I suck at keeping receipts)
MDF board – $20
Fabric, batting, foam: $55
Buttons – $13
total: $88
-$55 gift card: $33
$33 for an upholstered tufted King size headboard… I’ll take it!
Now, I was also planning on hanging some artwork to complete this bed wall project. Remember the mockup I drew last week?
Well, I changed my mind. The headboard is actually a bit more massive than this picture, and the frames would almost touch the ceiling. I think it would just be too much, and I need something a bit more delicate to fill the space.
After much deliberation, I decided a nice simple piece of driftwood would be the perfect touch… a la Holly of Life in the Fun Lane:
I hear these things are plentiful at our beaches… now I just have to go find one!
And lastly… I present to you, our next project:
Meet our sunroom. We haven’t done a single thing to it since we signed the papers on this house… except throw all of our unused furniture and a cat in there. It’s currently being used as my photo studio, the cat’s litterbox/playground, a storage facility for my surplus shipping materials, and a passthrough to the backyard.
It needs some serious help.
Remember how we road tripped to Ikea last weekend to get frames?
We didn’t get just frames.
I came up with this brilliant seating configuration for this room that would not only allow for plenty of seating, but it would create room for four guests to sleep.
We bought two of these Brimnes Daybeds, which I’ll arrange into an L shape:
And turn into beds when guests come:
The Ikea delivery truck is scheduled to arrive one week from tomorrow, so we’ll be anxious to get these set up.
We also decided on a new flooring solution because that carpet had to go.
In my beach house dream I’d have white plank wood floors, but because of the humidity and temperature changes in the room, hardwood was not an option.
What’s the next best thing? Tile that looks like wood!
We stopped by the tile shop and I pretty much knew immediately that this was “the one” when I saw it:
I think this picture lies though, because the tile is not that gray. It actually has a lot of warm beige tones mixed in, but we’ll see. I think it will look amazing either way.
We would need around 190 square feet, and the total (after our 50% discount for using their installer) comes to $756. We were quoted another $400 or so for installation, plus grout. That means it will be around $1200, but worth it I think. This poor room deserves it for looking this pitiful for so long.
Whew, ok, I think that wraps it up for this week. We’re both excited to start this new sunroom project, and there’s a ton of work to be done… so stay tuned!
Brad D, says
Who's that weird dude with the jigsaw.
Chantelle Bieber says
That plank tile is amazing… can't wait to see it!
Jacy says
Amazing job on the headboard! You are my hero 🙂
Can't wait to see what you will do next, keep it up!
Michelle says
The headboard looks professionally done, great job!
Amanda says
Wow! The headboard looks amazing. Great job. It really makes the bed look so much cozier and it'll look great with the driftwood too.
Hannah says
Amazing job! Looks great! 🙂
In The Night Sky says
Great job with the headboard, it looks fantastic 🙂
Brittany says
Wow! You make it look so easy! Way to go, girl!
I definitely would love to do something like that someday soon.
threeacres says
That headboard turned out great! It looks so comfy and inviting. I'm excited to see how your tile turns out. I haven't ever seen a grayed wood look like that but I think that is a perfect application for it.
ALICE says
Oh, I can't wait for the sun room! And the headboard looks great, very pro. 🙂
Karen says
that headboard is gorgeous!! can't wait to see what you do in the sunroom – it looks like a great room to work with, with lots of light.
sarah says
Simple, beautiful, and to the point! Great pictures,steps, and instructions- totaly makes me want to make my own!!
Rachel @ The House of Burks says
Oooh, you make it look so easy! I'm going to attempt making a new headboard this weekend. If it turns out anywhere near as lovely as this one, I will be thrilled. Great work!
AlohaAllyson says
BRAVO!! I am hanging my head in shame at the fact that I spent close to $1,000 for an upholstered headboard (and base) from Pottery Barn and you did it yourself for THIRTY THREE DOLLARS???!!!?? Amazing. Job well done.
Michelle G says
Awesome job it looks great! I'm starting to make a headboard myself! I was wondering if the mattress topper created ripples in the fabric from the zigzag design? It looks great in the pictures, I don't see ripples, just wondering if you had to do something to combat that. Thanks! 🙂
Amy C says
This comment has been removed by the author.
Amy C says
Your headboard turned out awesome. I LOVE the fabric you chose. Excellent choice on the wood look tile. I have been drooling over some in a mahogany color for a while now. Can't wait to see how your sunroom project comes out.
JORDAN says
Wow! I LOVE your site! I actually found it because I discovered your font (which I really like) thats on dafont.com and decided to check out your blog. When I looked through your house tour I realized I have like a ton of your photos pinned! I love your front entry way and the board and batten and your kitchen and your bathroom. I also have been wanting to do my own tuffed headboard so this will def get pinned too!
everydaylife0f5 says
Love it! So funny cause I just created my own headboard and I used that exact material and used the same method. Great minds think alike! lol Check mine out at : https://everydaylifeof5.blogspot.com/2012/04/diy-tufted-head-board.html
I hope you don't mind but I mentioned your blog……….love your tutorial!
Katie says
What is the name of the beds you used in your sunroom. I know they are from IKEA but I am very interested and am unable to find them in all white on the website. Help please! You have inspired me on how to do my sunroom!
Sassy says
Awesome job!
Anonymous says
I have everything to make the headboard but the MDF. How did you get the board home? I do not have a truck—but a Honda CRV. I haul a lot in it but not a 4 x 8 sheet of anything.
Jenna Sue says
We borrowed a friends truck, but they have truck rentals (by the hour, I think) if you have no other options.
Anonymous says
I'm also wondering which bed that is from Ikea–it is exactly what I need. Any help would be appreciated.
Jenna Sue says
Brimnes!
Anonymous says
Thanks so much. I was doing searches for twin size and it never came up and I now see that's because it is listed under daybeds! I prefer this one to all the other one's I found at the same price point. I'm so glad I happened upon your site in one of my other searches for diy headboards.:) One last question: I can change the pulls on the drawers, right?
Jenna Sue says
I just double checked, and the pulls have a screw on each end instead of just one in the center, which may make it difficult to find a replacement handle :
Anonymous says
I was wondering where you bought your nightstands ! I've been looking everywhere for some just like yours!
Jenna Sue says
Ikea, but check out this post: https://jennasuedesign.blogspot.com/2011/08/ikea-hemnes-nightstand-hack.html
Anonymous says
You did a phenomenal job! Thank you so much for documenting this so well. That is exactly the type of headboard that I am saving up my money to buy, but now you have inspired me that I could really make it myself.
Maggie says
This comment has been removed by the author.
Ally says
Good job! Off topic, what color and brand of paint do you have on your walls? I love the 'simplicity' of your room, the colors, decorations, so peaceful and beautiful. I am trying to figure out what to do with some of the walls in my bedroom and I really like the empty frame you've got on yours.
Thanks!
plumbing says
Decide on what kind of aura you want for the bedroom. This can help you choose the kind of headboard to use and the design to apply.
Jenna Sue says
Valspar's Stillness (there's also a full paint/room source list in my Florida House page tab!)
Ally says
Awesome! Thanks 🙂
Amanda says
Been dreaming about this DIY headboard since your post last March and I finally got all the supplies to do it today 🙂 I know the height from the lowest to highest point is 35″ but would you mind telling me how high it is on the sides? We also have a king size bed and I love the shape of yours – going to try to make as close to the same size as possible. Thanks so much 🙂
Glamorous Mommy says
I'm attempting a tufted headboard this weekend! So glad I came across your post, it's gonna make it much easier for me 😉
– Fotini { https://glamorousbride.blogspot.com }
Anonymous says
I'll soon be doing a headboard…just trying to decide on the right fabric. I was going to throw away old mattress covers, but washed and kept to use as batting. Why don't you do the tile project yourself? Lots of do-it-yourself info. online and most tile stores have classes. Hubby did ours and is very nice.
Katie Rose says
I just made one myself – I actually used egg crate foam mattress toppers…just turned the egg-y part towards the wood so the whole thing wasn't bumpy. Probably no cost savings there except for the fact that I had an extra one lying around so it was free for me 🙂
Other than that, turned out great! Super easy! 🙂
PS: Also..I found this exact same fabric in my walmart…also for $2.50 a yard. Worth checking out if you like this fabric!
Richard Duncan says
What thickness of MDF did you use?
Chelle says
Just found your blog…..just googled upholstered headboard DIY and yours popped up! Brilliant idea to use the washers when doing the button tufting! Thanks!! We're right in the middle of building our bed and your tutorial is great! Thanks!!
Jenna Sue says
I don't remember exactly but I want to say either 3/4 or 1″.
Jenna Sue says
Sorry for the delay! I just measured, it's around 24″ tall on the sides.
hvac training California says
Can any bed frame accommodate a headboard? Does the bed frame come with a headboard or do i have to purchase it separately? Where can i buy a bed frame from? Thanks
Drew says
This comment has been removed by the author.
Molly says
Awesome tutorial! I've been dying to build a headboard like this for our bedroom revamp! This will be so helpful. Thanks!
Anonymous says
Thanks for the headboard instructions! I'm making one this weekend!
Kara says
Thank you so much for including installation! I've literally found a dozen tutorials for an upholstered head board and NONE of them had anything about installation. Frustrating! I love the fabric you found too!
Anonymous says
I just finished making two headboards based on your instructions including installation.
Thank you so much for posting instructions or I wouldn't of known where to start in terms of materials. One of the headboards was for my daughter and it was massive….. we ended up using a tube to run the needle straight thru the 4″ padding that she wanted.
Just wanted to say THANKS!
Cheryl
Anonymous says
Hi Did you apply any glue (what kind?) to adhere the foam mattress toppers to the MDF or in between the layers of foam?
Kristina says
This is exactly what we want for our bedroom!! I bought all of the supplies yesterday but forgot the mattress pads, will be heading out soon so I can get started on my first big DIY project! Great instructions too. I am going to try it with a grey/brown vinyl fabric…hope it looks half as good as yours! Thanks for the blog!
Jenna Sue says
Nope, no glue!
Anonymous says
How do you know where to put the buttons once the fabric is on?
Jenna Sue says
We drilled the holes right after we cut out the headboard shape!
Maureen Kilcoyne says
Your headboard came out fabulous! Thank you so mipuch for the detailed tutorial. I had made one a few years back out of plywood and it was so heavy! I think the MDF is a better option! May make another…you've inspired me!
Maureen Kilcoyne says
Your headboard is fabulous! I made one years ago using plywood as a base. I like your idea of MDF…more lightweight (and less expensive)! I may make another…you've inspired me! 🙂
Ashley says
Love it! Trying to decide what I want to make for our headboard! Oh and how to decorate my new porch! So many ideas!
Anonymous says
Thank you so much for posting. I have been looking for something like this. How many yards of fabric did you use?
Jenna Sue says
2.5 yards 🙂
Anonymous says
The headboard is beautiful, I have had iron headboard that I'd love to convert to a covered headboard (new look after 6 years), any suggestions?
Alliejean says
Thanks for posting this. My husband and I made our headboard last night and it turned out great! I never would have thought about ironing the fabric till it was all done and looked like crap though 🙂 So thanks!
Marta says
Hey Jenna, did you think about attaching it to the actual frame instead of mounting it on the wall? Would you have any suggestions on doing this?
Jenna Sue says
Hey Marta! We just have a metal frame that sits on wheels, so I'm not sure how we could have done that. I've seen people attach a 1×4 to both sides behind the headboard and just prop it up on the ground. I'd probably try that first if I didn't want to make any holes in the wall. But honestly, I think the french cleat is the easiest/simplest way to go!
Nicole says
Amazing DIY headboard tutorial. I love the end result, but I would have dare to use a bold color.
Miyu Toyoshima says
I've decided to use your tufting tutorial for an coffee table/ottoman I'm building 🙂 The lady at JoAnn's said for sturdiness (looks like you had some thread breakage, too!), I should use a wire instead of thread (like the floral arrangement wire). Thanks for the washer idea, I was going to drill 2 holes next to each other to thread through, but it sounds like it'd be easier with the washer!
Anonymous says
Also, the woman at Joann suggested using waxed dental floss in place of thread. It won't break as easily, and when you pull it through, the wax heats up a bit and sort of seals things. She also recommended using a button with holes instead of a washer. I'm making mine tomorrow. We'll see how it turns out! Thanks for the inspiration!
Brianne
Unknown says
I love, love, love your bedroom chandelier. Where did you get it? It's gorgeous!!!!!!!!!
Jenna Sue says
Thanks—Got it at Urban Outfitters!
Anonymous says
My material is not smooth once I started to put the buttons any suggestions?
Jenna Sue says
If it's just wrinkled (and not excess fabric) you could try lightly ironing it or using your iron's steam setting. Mine wasn't completely smooth around the buttons and I just sprayed a bit of wrinkle releaser on it and they lifted right up. Hope this helps!
Anonymous says
Next time you need to cut foam get the object up off the floor, turn it foam side down and follow the edge of the wood with an electric knife. Works like a charm!
Liv says
Hi… I am also planning to make a headboard and bought some mdf but there is a strong smell coming out from it. Do you think it is safe? I read somewhere that it can cause health problems… I am thinking of changing it to plywood.
Jenna Sue says
Hi Liv—I really nave no idea, never heard of that. I'd try googling first!
Nic Sweet says
I don't think I would be able to make such a chic upholstered headboard, but I have great appreciation for those who make their own. Jenna, you are so creative.
Anonymous says
Thank you for this. My husband and I made one this weekend and it turned out fantastic! Great instructions!
Amy says
It is taking me forever to get the template to look right. Do you have any tips? Also, someone mentioned in an earlier post about the strong smell from the MDF board. I did a little research too and I am going for a different material because of the off gassing of ammonia that which supposed to be hazardous. There is a product called safe seal that is recommended to seal it if you are going to use the MDF board. I love this headboard! If I can only get past the template! Please help 🙂
Amy says
I do have a specific question that might help me figure out the template. We start off with 35 inches on the side but what was you finished length after you made your final cuts? I feel like my template is cutting off too much on the edges. Thanks again. I can't wait to get it finished and put it up!
Jenna Sue says
I don't remember exactly but there's no exact formula you need to follow, it's whatever you like! Just from looking at the photos it seems like somewhere around 12-15″ from the top is in the ballpark.
I never noticed the MDF smell so I'm not really sure about that, maybe we got a different type/brand of MDF?
projectmom says
You could also cut in half and put back together when you get home.
Kate says
Hi, I just discovered your tutorial via a google search. I do have a question that is completely unrelated to headboards. Where did you find the rug in your bedroom? Also, is it scratchy at all? We are working on redoing our bedroom and this tutorial was very inspiring. Thanks for sharing!
Jenna Sue says
Hi Kate—it's the Ikea Tarnby rug. It's a natural fiber jute rug so it's not exactly soft. For the price I would recommend one of the natural fiber rugs at Rugs USA instead. More sizes and a better deal IMO!
Kate says
Thanks so much for the information! I was browsing your blog and noticed you have this rug in your new home. Would you say this is softer / less scratchy than the Ikea rug? https://www.rugsusa.com/rugsusa/rugs/rugs-usa-chunky-loop/bleached/200NCCL01-P.html
Jenna Sue says
Yes, it's my favorite rug ever! I bought 3 of them!
joy says
I completely agree with you. I really like this article. It contains a lot of useful information. I can set up my new idea from this post. It gives in depth information
Star @ A Load Of Craft says
Thank you so much for the beautiful, inspiring headboard and the great tutorial! I linked to this post on my site at https://www.aloadofcraft.com/2014/08/tutorial-how-to-make-tufted-fabric.html
Thomas Watson says
How did you attach the headboard.
https://www.everythingheadboards.com/ says
This is impressive! Loving the color and texture.
Brenda J. says
Just completed mine. Thanks for the tutorial!!!
Hal says
It looks good. Nice heads up about the wireless tool.