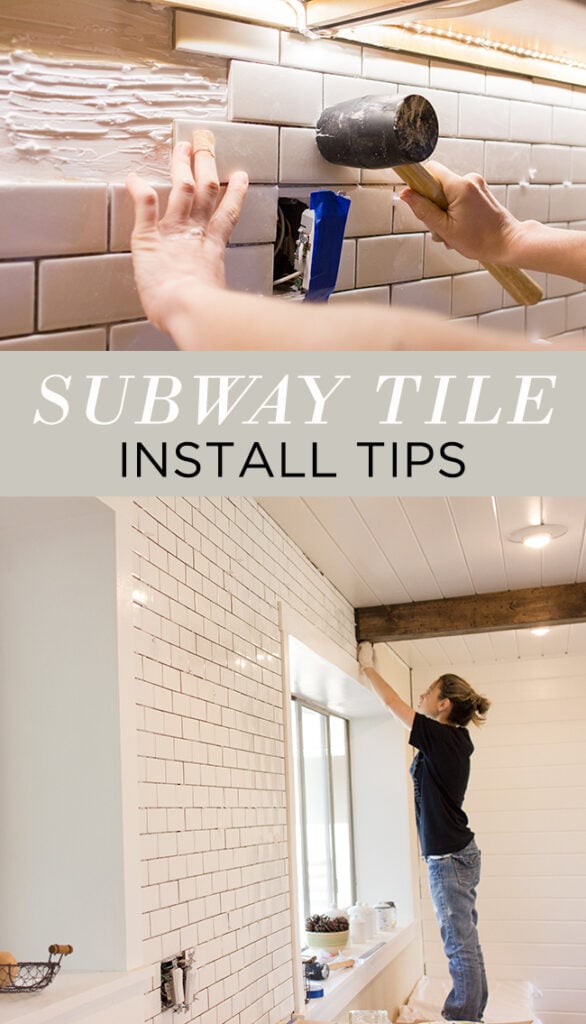
Happy St Paddy’s Day! We celebrated this weekend with a new backsplash…
Only problem is… this stuff isn’t cheap. We even made a trip to the city where we spent all day at 14 different tile shops, and everything similar was around $20/sf. Because we wanted to cover the entire back wall, we needed around 80 sf. $1600 for tile is not happening. Nor is $1000. I didn’t even want to spend $500. So it was back to the drawing board…
Classic white subway was always in the back of my mind as an option. Half of the kitchens I’ve been drooling over on Pinterest have it…
But that’s the thing, I didn’t want to look like every other kitchen. But then you realize that Pinterest =/= real life, and white subway tile probably won’t ever go out of style, and it’s a very economical option. So I went for it.
Instead of the individual standard 3×6 tiles, we opted for the smaller 2×4’s that come on a sheet—because I thought the smaller scale would add more interest, and they seemed easier to install.

We originally got bids for the labor (tile has always been something we’ve hired out because we’ve never trusted ourselves to do it right)—but the quotes all came back at over $1000, which we did not expect at all. I guess labor is cheaper in Florida? Anyway, with all that we’ve accomplished since owning this house, I was feeling confident and told Brad I thought we should go for it. My dad said he’d help out on the first day so that sealed the deal.
Here’s what we bought from Lowe’s to get the job done:
Tile (80 sf)
Type 1 Mastic (a 3.5 gallon bucket, and we used maybe 2/3 of it)
Grout (Mapei in Warm Gray)
Colored caulk to match the grout
Grout sealer
A 1/4″ notched trowel to spread the mastic
A grout float trowel
A sponge
Spacers
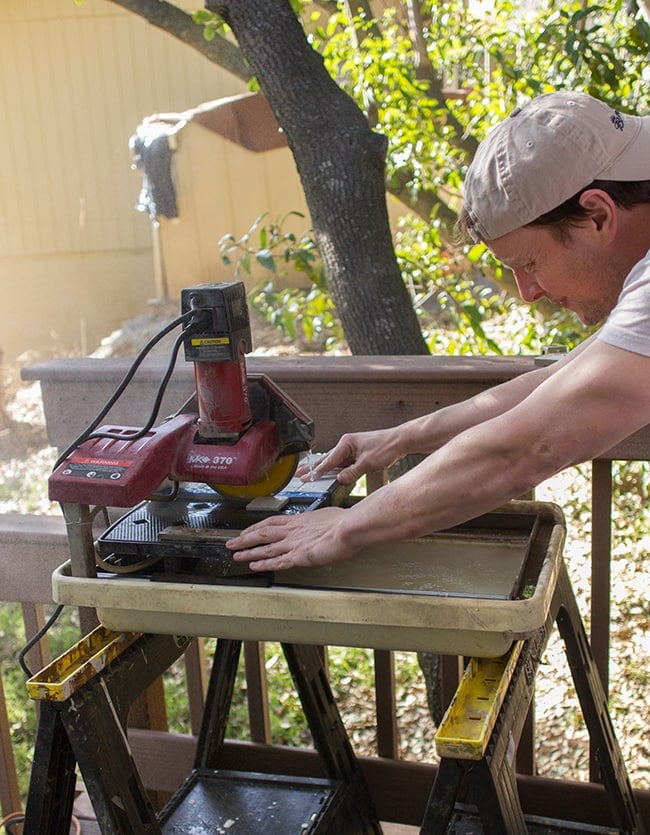
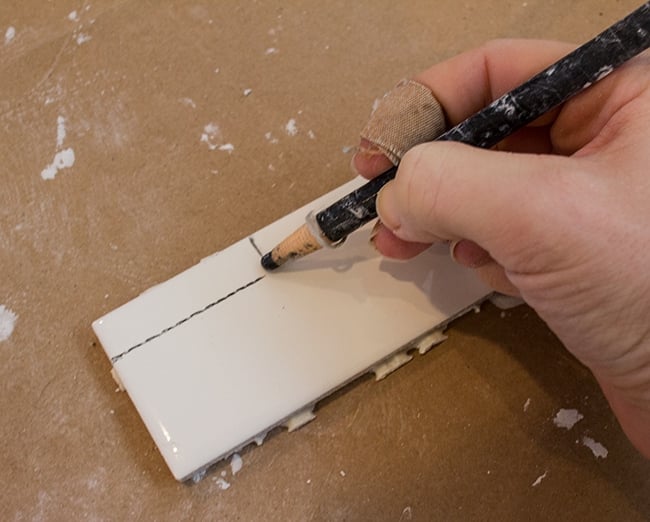
Our family friend let us borrow his wet saw which was a huge lifesaver. We were concerned that we’d need a scoring knife or tile cutter for smaller cuts but it wasn’t necessary at all.
The total for the tile came in at $299 (we have two sheets leftover so we can return them for $7, woohoo) and it was about $110 for materials.
I spent some time researching (thanks everyone for the advice in my last post!) and here are a few helpful tutorials I found:
Armed and ready, we began our journey Saturday morning…
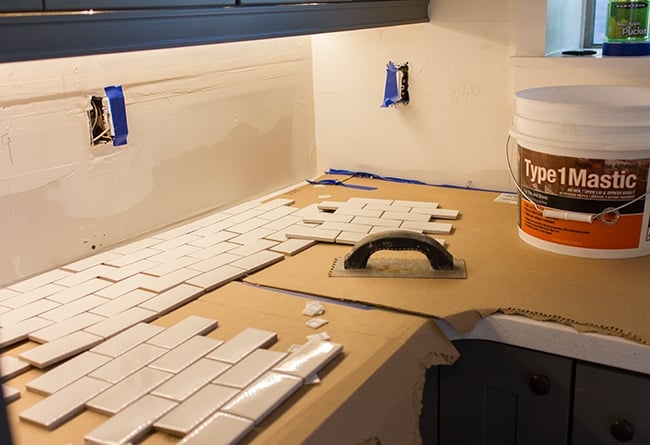
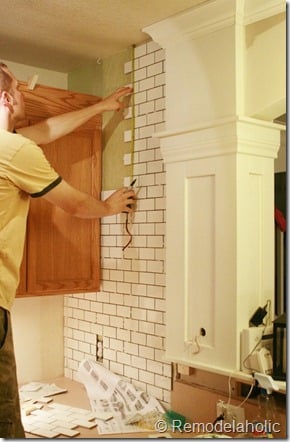
We got a system going—Brad and my dad cut the tiles while I spread the mastic and installed them.
I was so relieved after the first few tiles went in. We could actually do this!
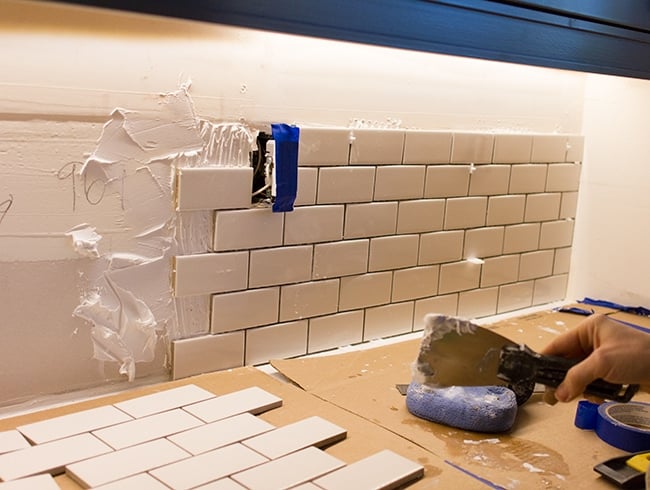

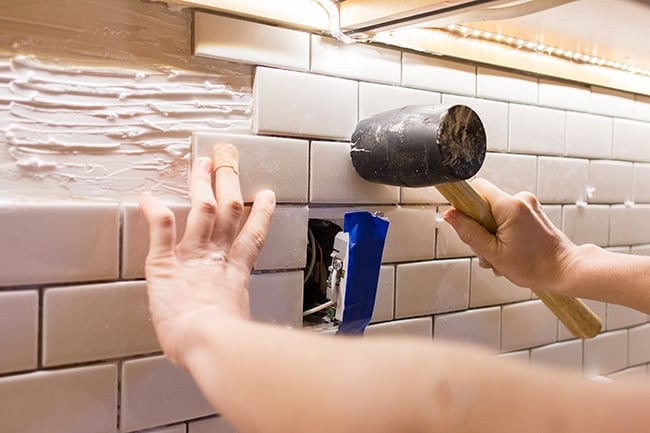
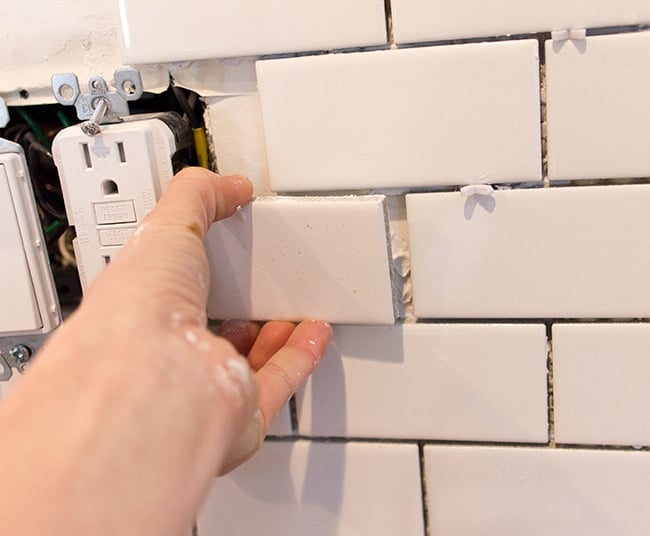
To make sure they properly adhered to the wall and were all level, I nudged each tile in with a rubber mallet.
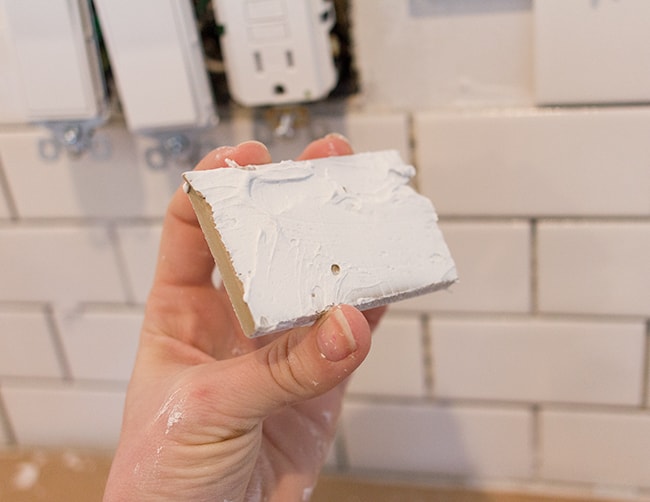
If there was too much mastic, it would seep through the cracks so I swiped it up with a small screwdriver.

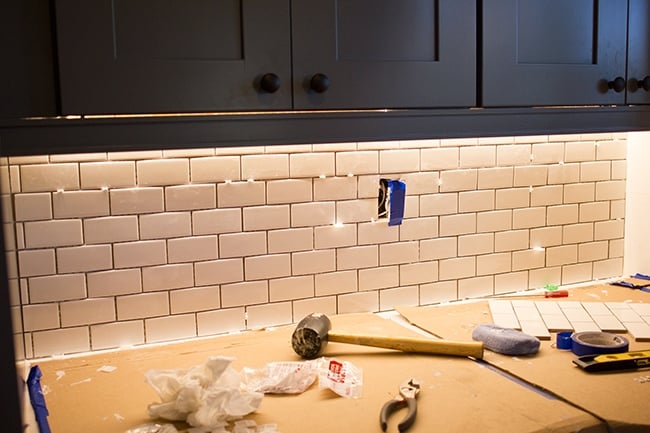
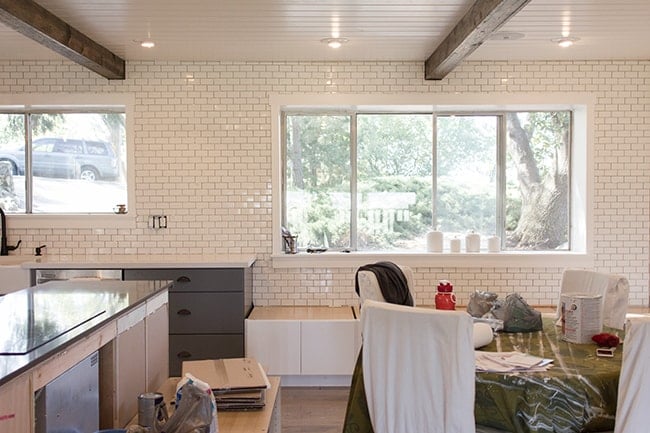
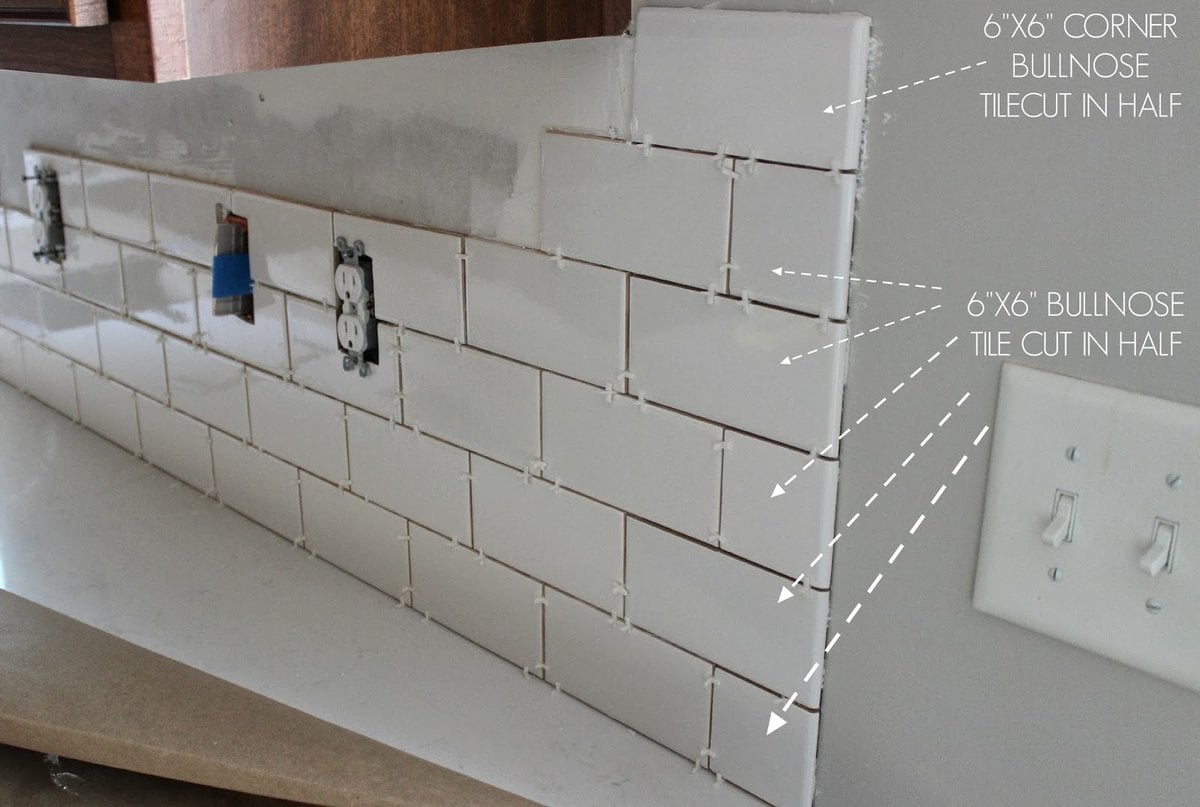
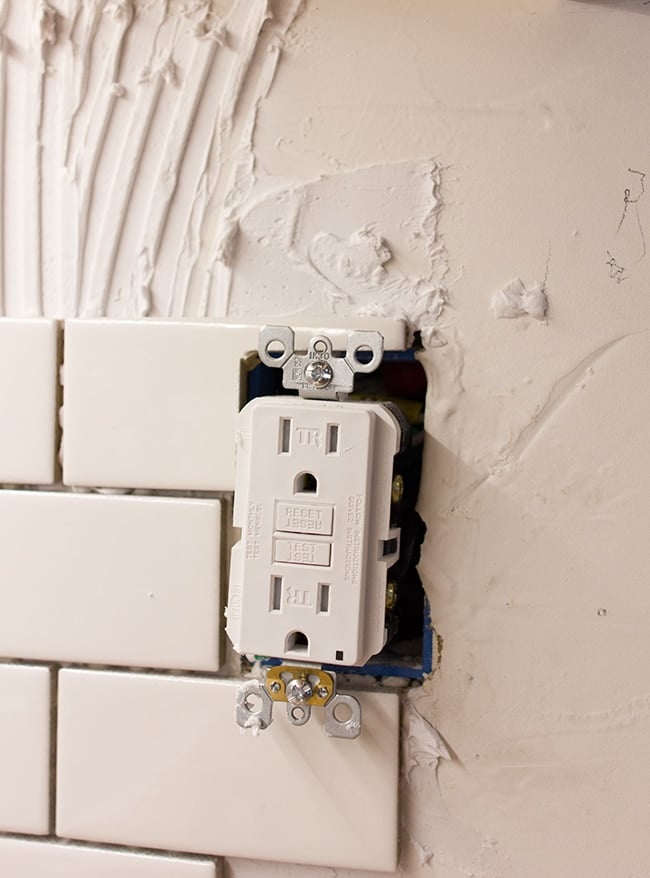
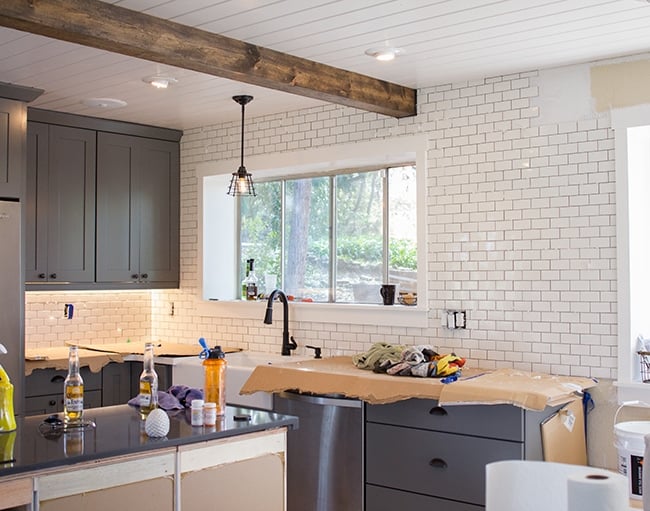
We were so lucky here… the area above the sink fit four rows of tiles perfectly so we didn’t have to make any cuts.
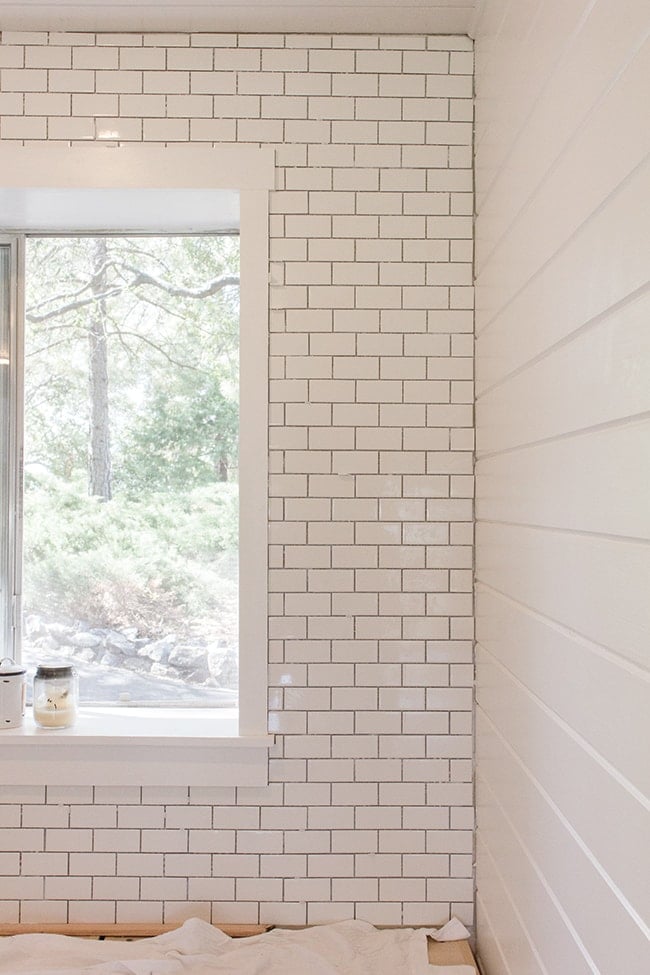
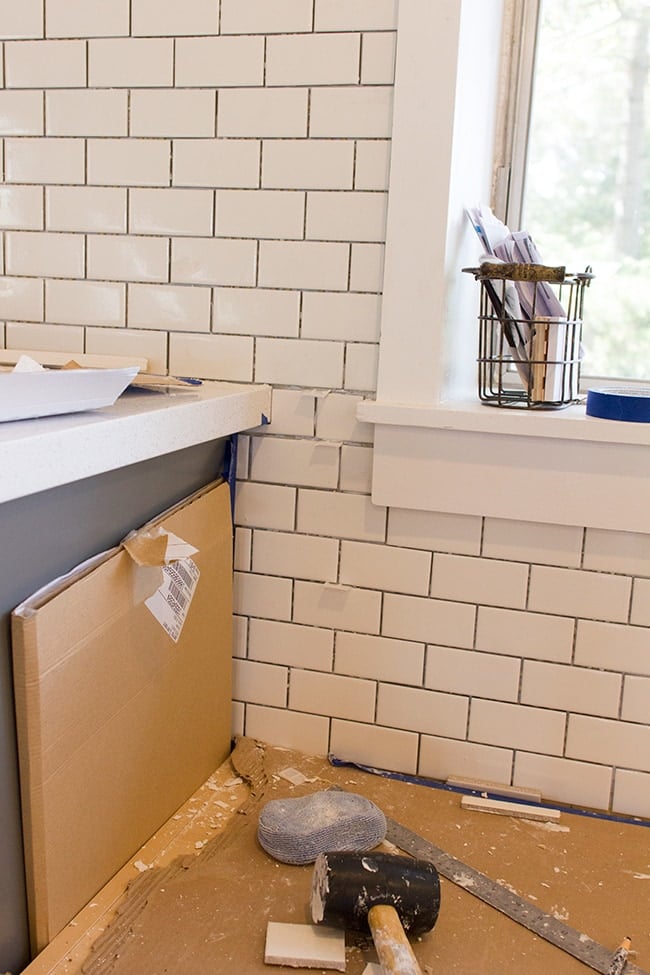
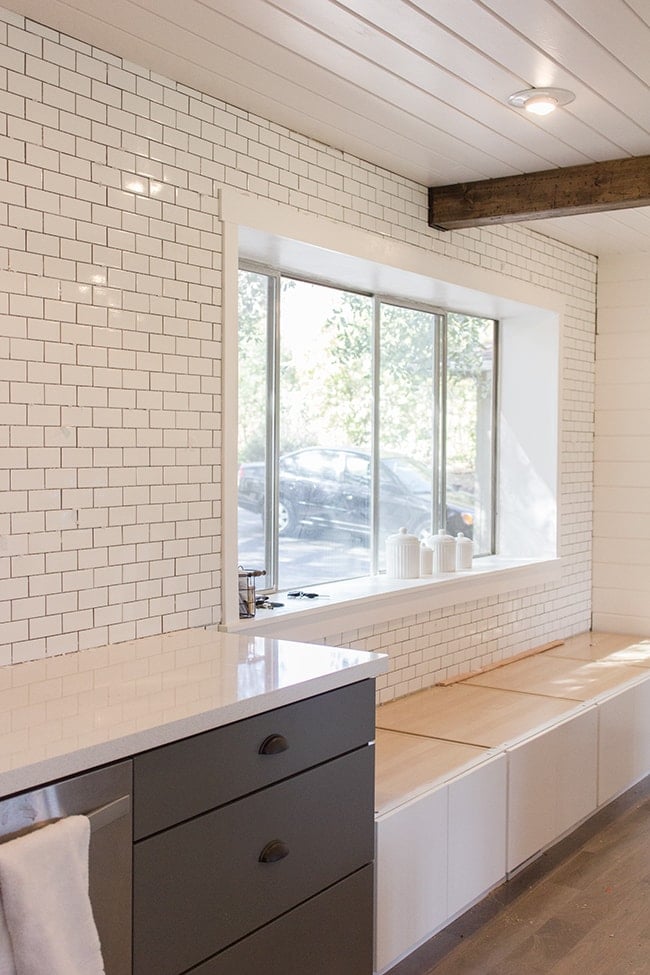
But of course it evened out in other areas, like this one, where there were some small pieces against the window. We also had to leave a gap next to the door, otherwise it wouldn’t be able to open all the way (bad design).
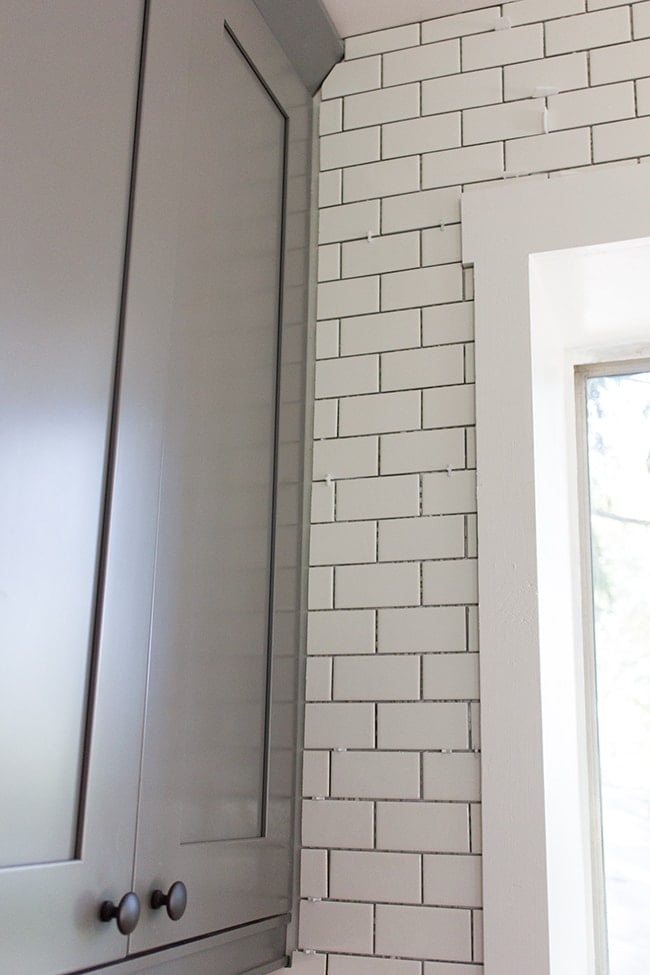
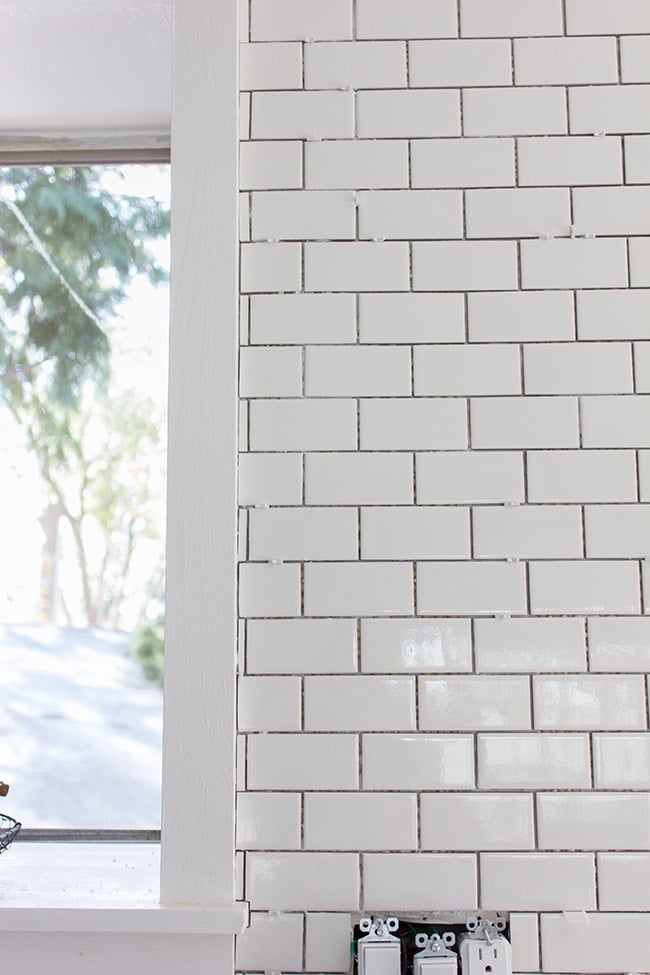
Here’s the other side of the window:
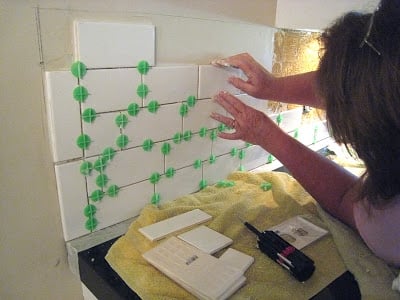
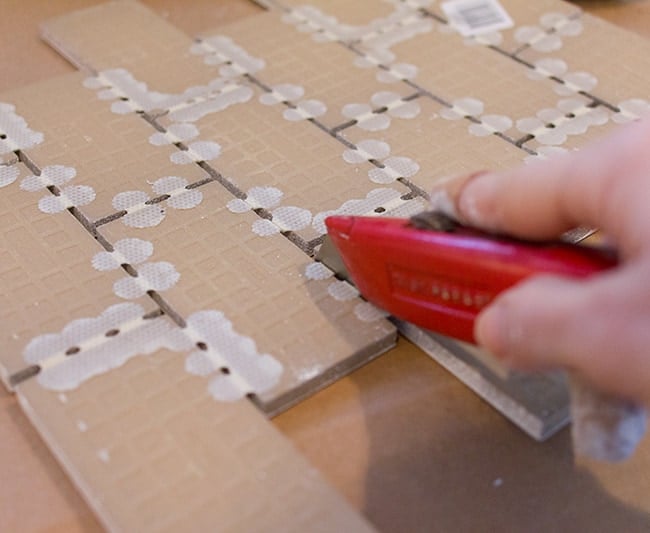
When stacking sheets of tile vertically, it’s important to use your spacers! Even when they go in perfectly if you don’t think you need them—they tend to shift. Often times I would step back and find tiles from earlier that had moved and I had to go back and shove spacers in before the glue dried. Fortunately, mastic gives you a pretty generous window (~30 minutes) for making adjustments. But my advice is don’t skimp on the spacers, they’re good insurance.
At around 4pm on Saturday (after 5.5 hours), we called it a day.
The next morning we were setting up and realized we’d forgot to wipe the mastic off of our starting point, which meant we had to scrape it off so the wall was even and the next sheet of tile would be level.
Don’t forget to clean the mastic off first if you are going to take a long break!
On the second day I got smarter and wore latex gloves. SO much better than having mastic stuck all over your hands and having to scrub it off.
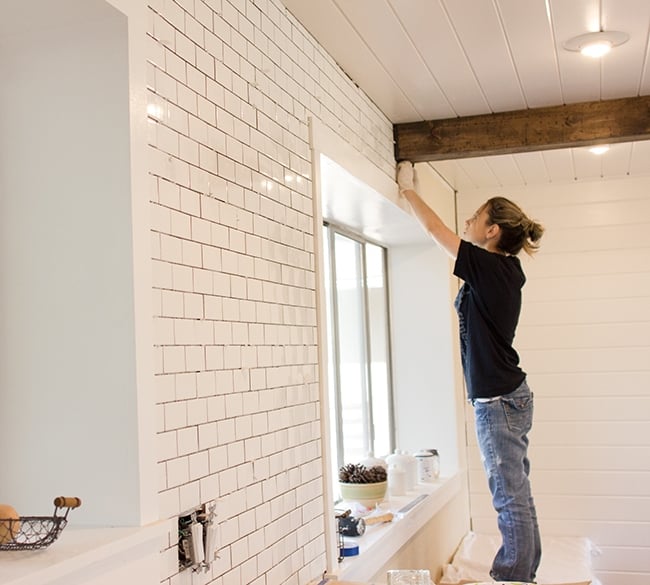
Really, the most difficult part of the whole job is just the physical energy it requires. Cutting and measuring is the easy part—spreading mastic for 5+ hours gets tiring. I’m still slightly sore.
But watching it all come together is oh so worth it.
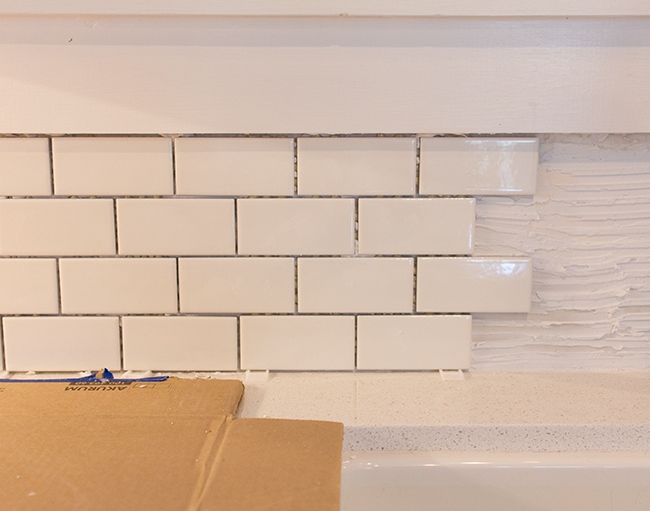
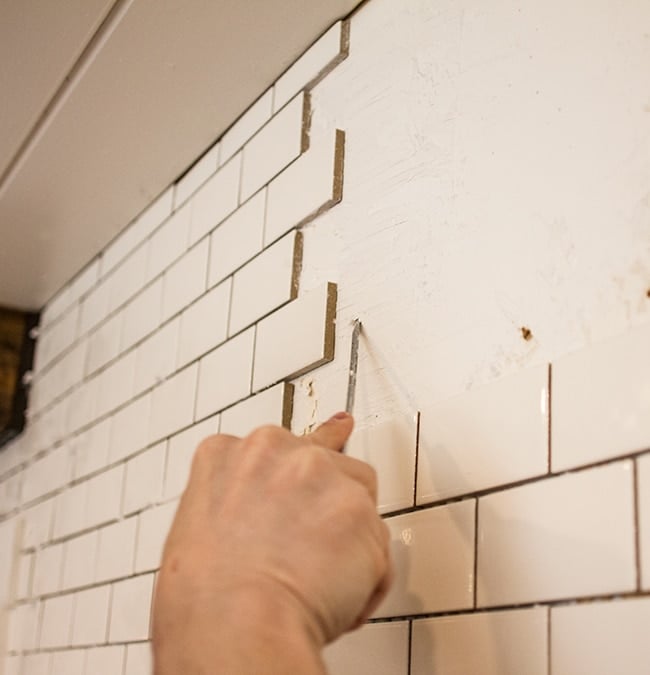
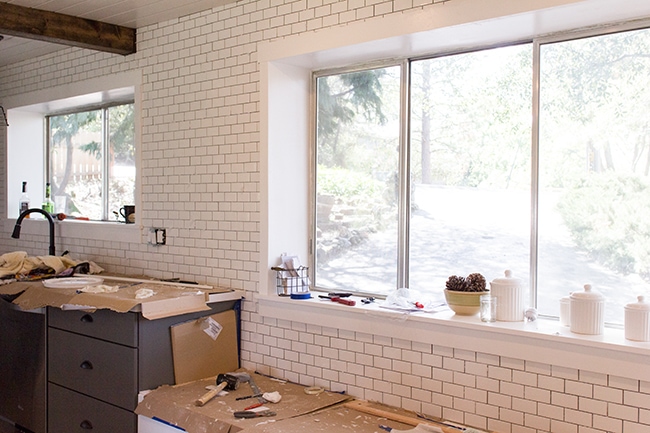
Finally, we made our way underneath the window and back around to the end.
Actually, the end was the hardest part. Since we made a big loop around the window, the tiles had to meet back up at some point. Making sure the right side matched the left side so that they were perfectly interlocking when they lined back up was a challenge.
We actually didn’t even think about it until it was too late, so the gaps were a little larger than they should have been.
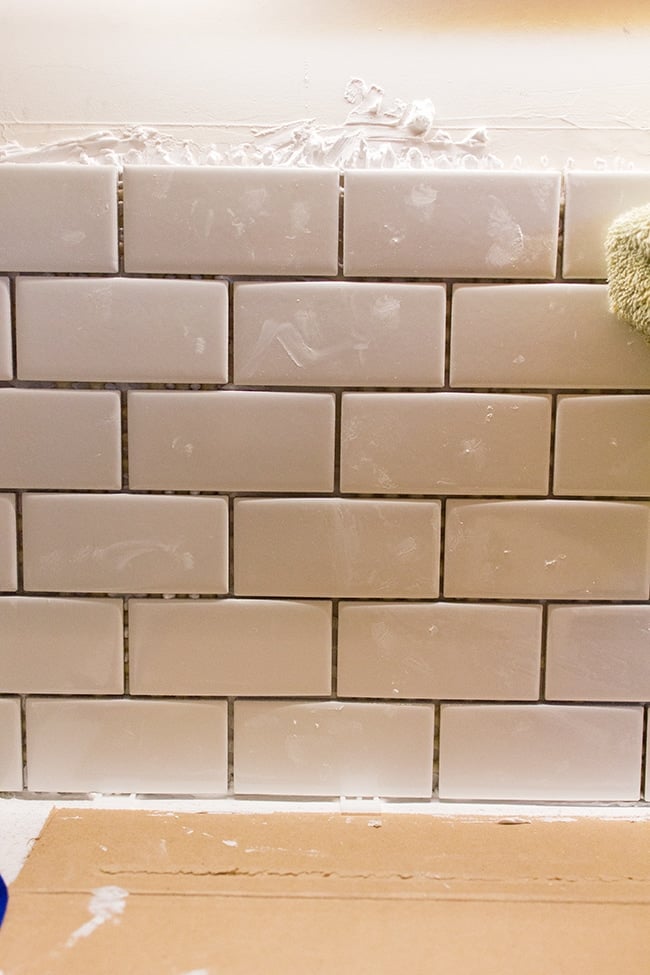
It’s important to note that tiling is an imperfect process. Even from the factory, some gaps were closer to 1/16″ and others were over 1/8″, so I wasn’t going for perfection here.
And when you look at the big picture it’s not really noticeable…
There will be pillows there which should help, and I also have a backup plan if it ends up bugging me (hint: white nail polish).
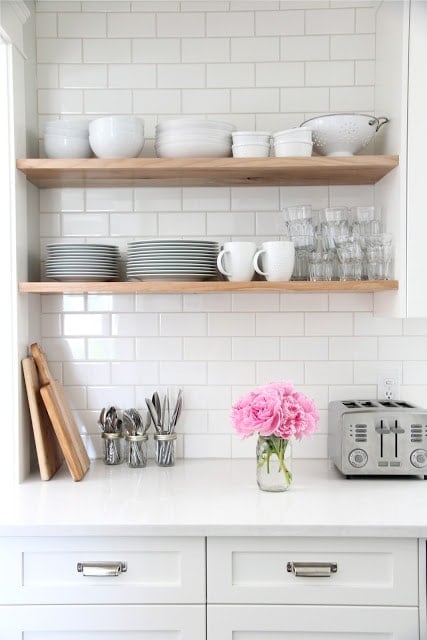
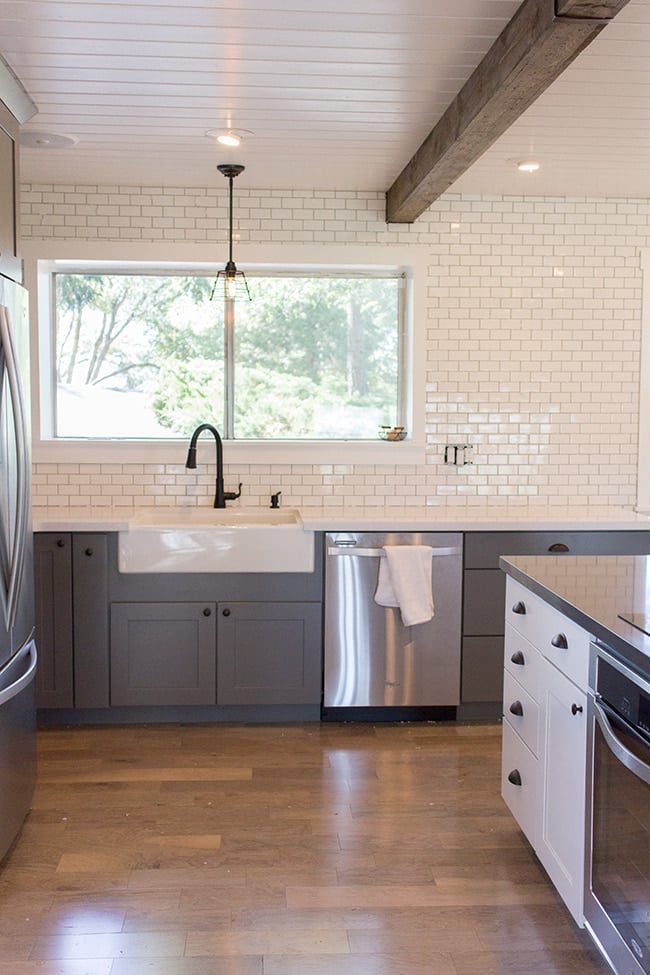
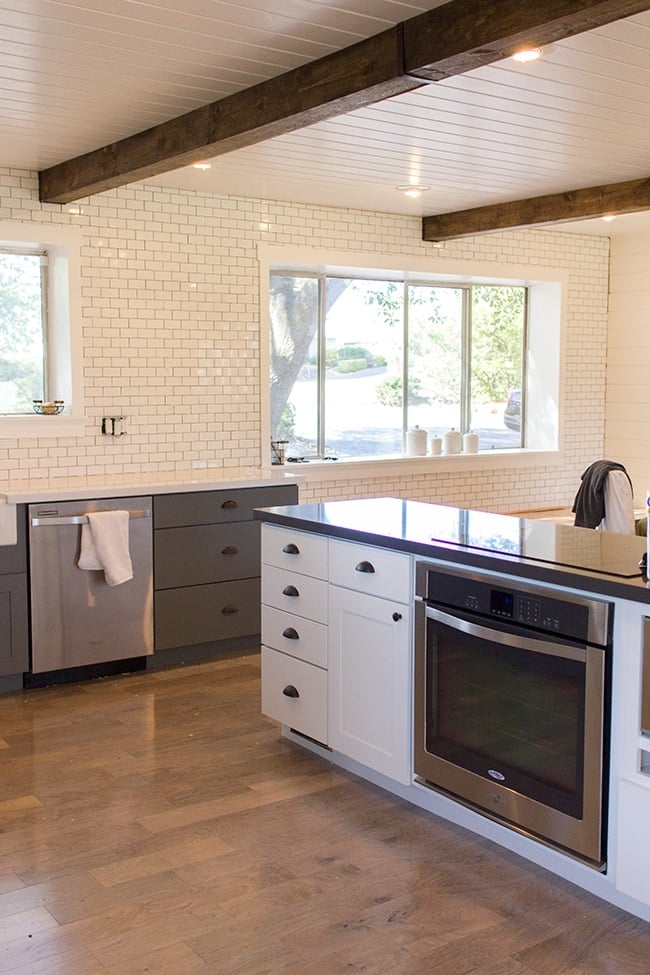
Walking into the kitchen is like a breath of fresh air now…
It really adds so much.
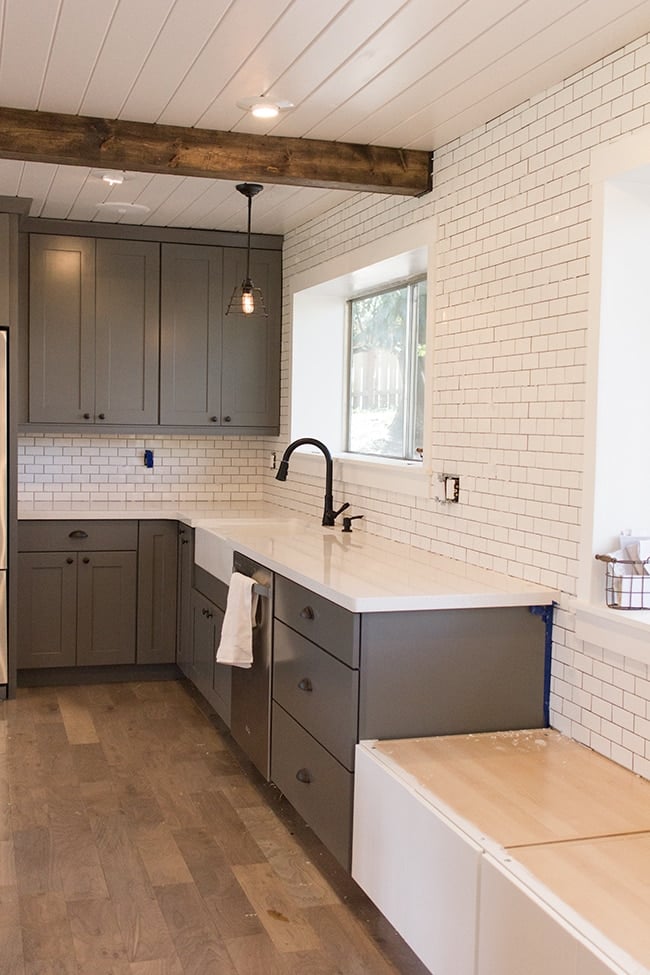
Oh, and we’ll be trimming out the top and the right edge where it meets the planks with quarter round.
This afternoon I’ll start grouting. The matching caulk was special order and won’t be here for 1-2 more weeks, but we have plenty more to do this week (like build the second bench seat and tile our bar wall!)
More to come in a few days…


Victoria says
I’m in love. I’m so glad I’m reading this two years later because that means the project is completely (hopefully). I’m going to tryn this with my husband in our new house. I feel super inspired.
Celestte says
Hi. I’ve been a long-time follower, but this is the first time I’m commenting. I admire your courage and bravery in sharing your personal journey with us. I’ve been following you since the Florida house and absolutely love your style. I currently have subway tile as a backsplash that goes to the upper cabinets. This summer I plan to remove my upper cabinets and tile all the way up to the ceiling. I love the gray grout you used. I went to click on the link in the Kitchen Chronicles: Subway Tile Part 2, but it brings me to your ‘E-Design’ link/announcement. Do you still have the information or has that link been removed permanently? Just curious as I was looking forward to following your direction. Thanks in advance. You are an inspiration. Looking forward to continuing to follow you as you transition into your next season of life. Best wishes.
jennasuedesign says
Hi Celestte, I’m sorry! Where are you finding a broken link? I looked through both posts and can’t find it, but the grout is listed on both. Here’s a link to the part 2 post if that’s what you’re searching for! https://www.jennasuedesign.com/2014/03/kitchen-chronicles-diy-subway-tile_20/
Cecil says
Hi! I’ve been following your blog for a while now and finally got the bravery to go ahead and give you a shout out from New Caney Tx! Just wanted to say keep up the great job!
GvLadybug says
What color are your cabinets? It is so hard picking a grey…. some are too blue some are muddy some are just not right! I feel like goldilocks!
Roy says
I love your kitchen and your advice – I’ll be doing the same to one of my kitchen walls next month… I hope it comes out as good as yours! One thing – what type of wood did you use on your ceiling and walls? I was leaning towards beadboard, but I like the look of your horizontal planks. Thanks!
jennasuedesign says
Thanks! It’s pine: https://www.jennasuedesign.com/2014/01/kitchen-chronicles-diy-tongue-and-groove-plank-ceiling/
Tonya says
Love, love, love this kitchen! I admired it so much I copied it and made my own version. I ended up going darker on the floor color and used a faux marble laminate on the counters. This also inspired me to do exposed beams for this first time. I will be doing those again in my next remodel. Love your work!
Drew says
The subway tile looks amazing! I love the look of a white kitchen. Thanks for posting!
Lyndsay Luca says
Gorgeous kitchen!! May I ask what type of floors you have??